
End-to-end guide for staff who create customers, upload PDFs, share signing links, and review completed signatures. Screenshots were captured on the live console using the dedicated documentation account below.
Documentation test account
| Field | Value |
|---|---|
| Username | doc.manual.test |
| Password | DocManual2026! |
doc.manual.test@hotelinnovativ.ch |
|
| Role | Sales |
This account can manage customers, upload work reports, offers, and contracts, and receive in-app notifications when a document is signed. It cannot open Settings or delete customers or signed documents (admin only).
How the platform fits together
- Staff sign in to the console.
- They create or open a customer with property, contact, product, and language details.
- They upload a PDF and choose a document type and email subject.
- The platform issues a tokenized signing URL for the customer.
- The customer opens that URL (no login), reviews the PDF, signs, and submits.
- The signed PDF is delivered by email to the configured team and/or uploader inboxes. The uploader also sees an in-app notification and can open the document detail or download the signed file.
1. Sign in
Open the login page. Authentication uses username and password, not email.
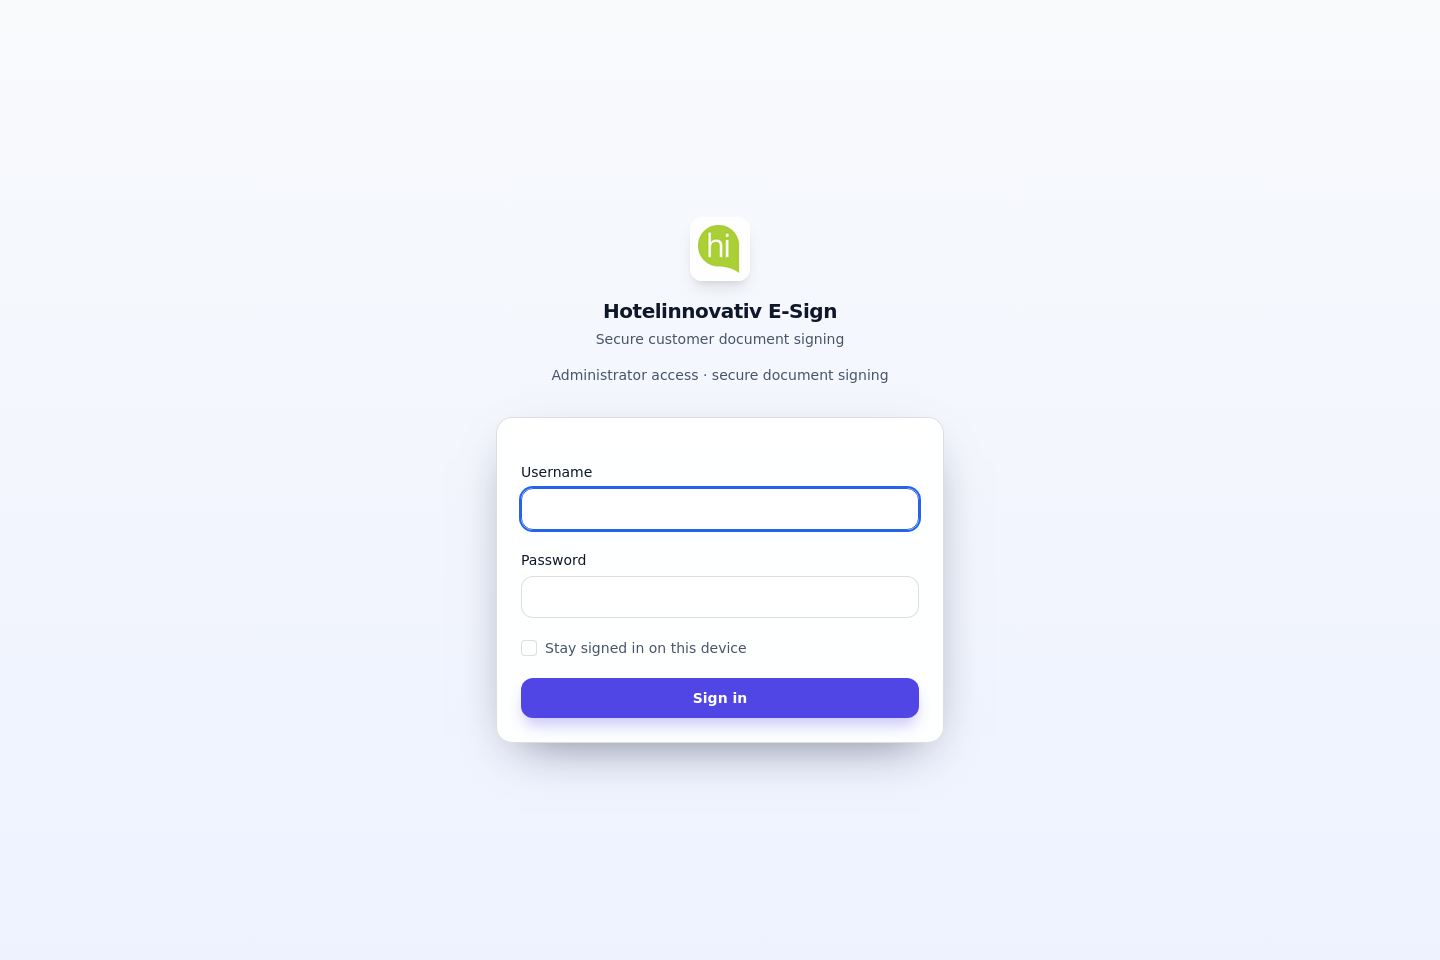
- Enter your username and password.
- Optionally enable Stay signed in on this device.
- Select Sign in.
After a successful login you land on the Dashboard.
2. Console navigation
The header is the same on every authenticated page.
| Area | Purpose |
|---|---|
| Dashboard | Overview of customers and document counts |
| Customers | Searchable list of customers you can access |
| New customer | Create a customer record |
| Documentation | This guide |
| Settings | Admin only: email, branding, catalogs, signing terms, users |
| Notifications (bell) | Recent signed-document events for your account |
| Light / Dark | Theme toggle |
| Sign out | End the session |
On smaller screens, open Menu for the same links.
3. Dashboard
The dashboard summarizes how many customers and documents you can see, how many are still awaiting signature, and how many are completed. Each customer block lists recent documents and links to Open customer or Upload PDF.
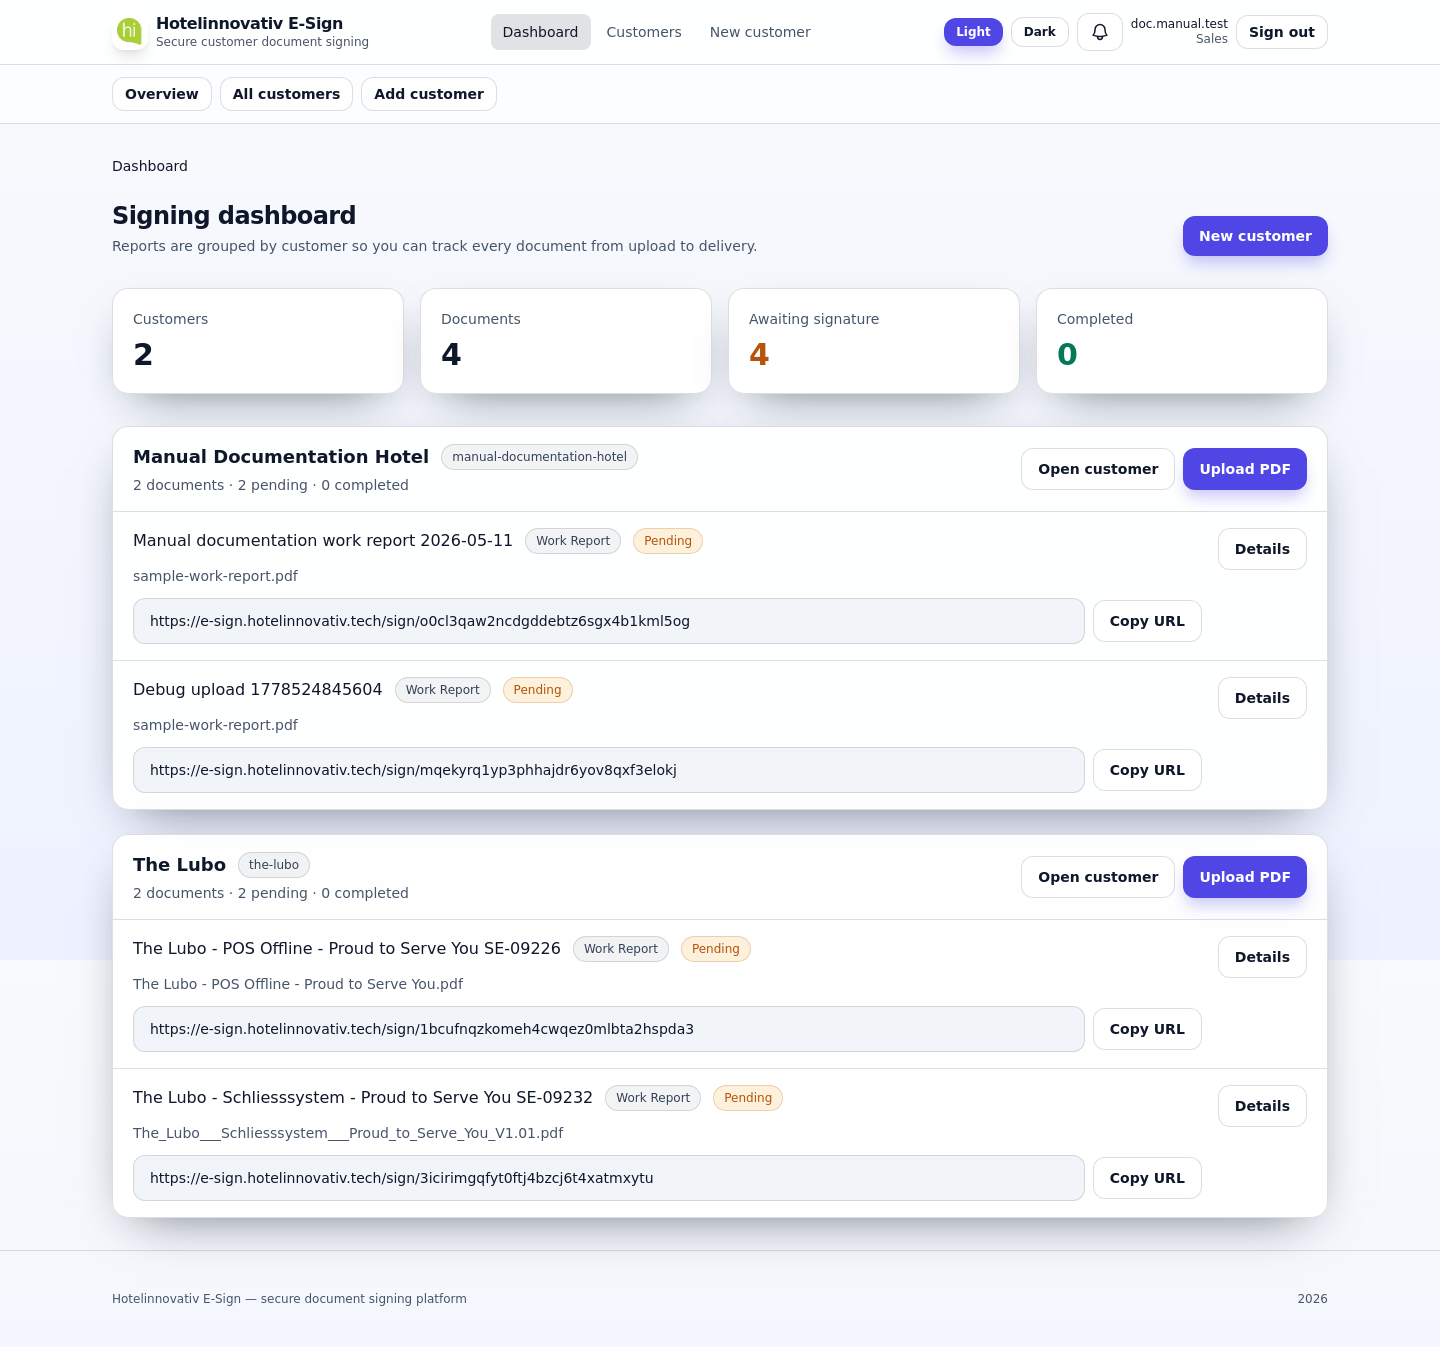
Remark: Sales and design users only see customers that already have at least one document visible to their role. Managers and admins see the full customer list. You can still open a customer by direct URL if you know their record id.
4. Customers list
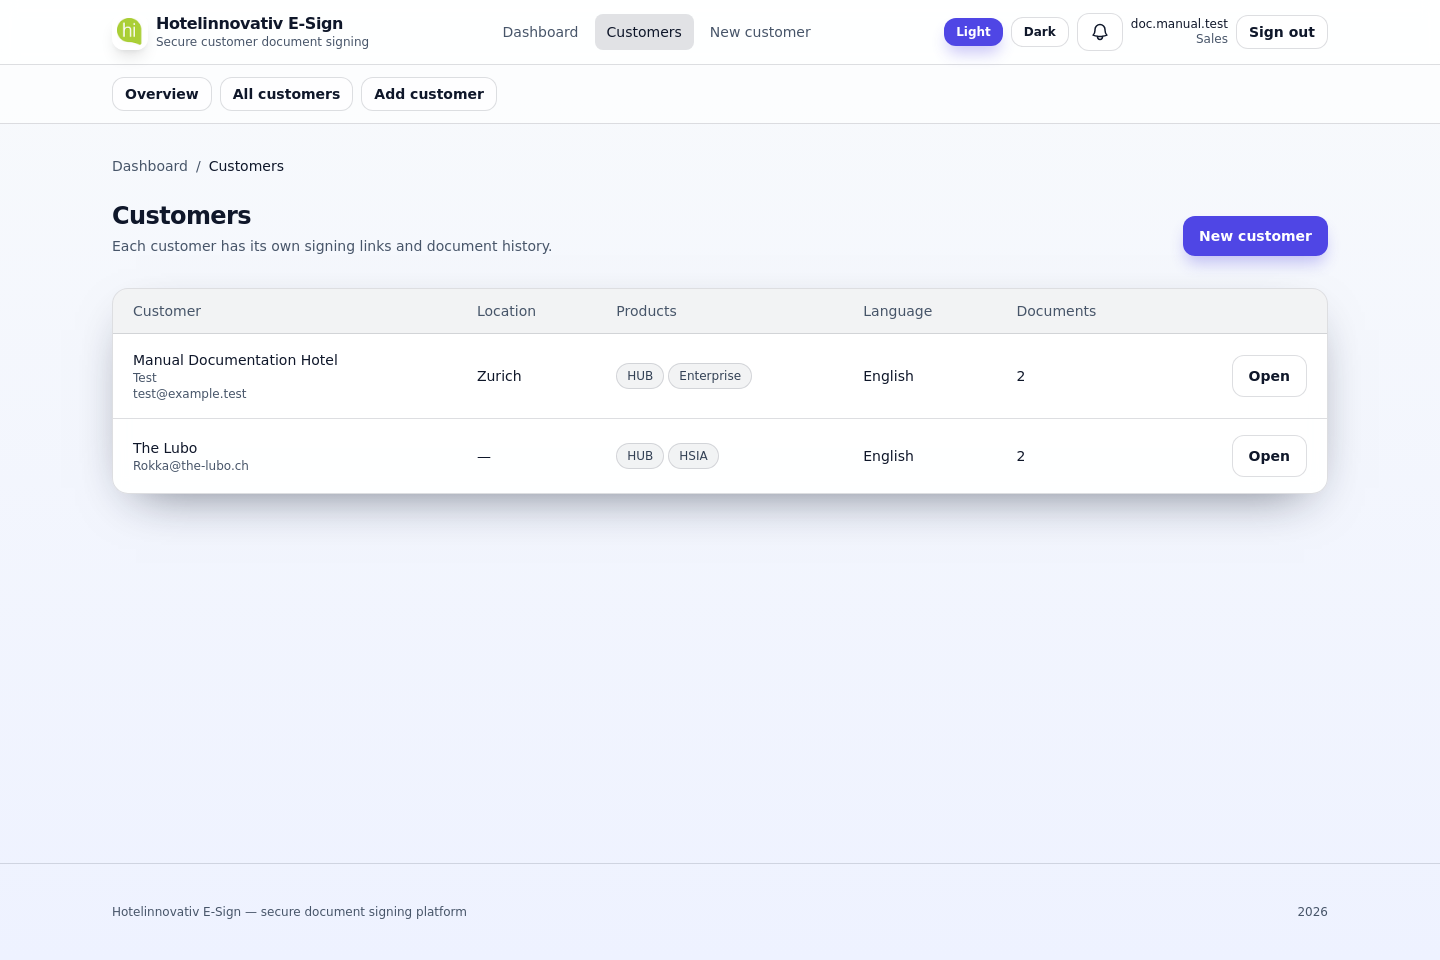
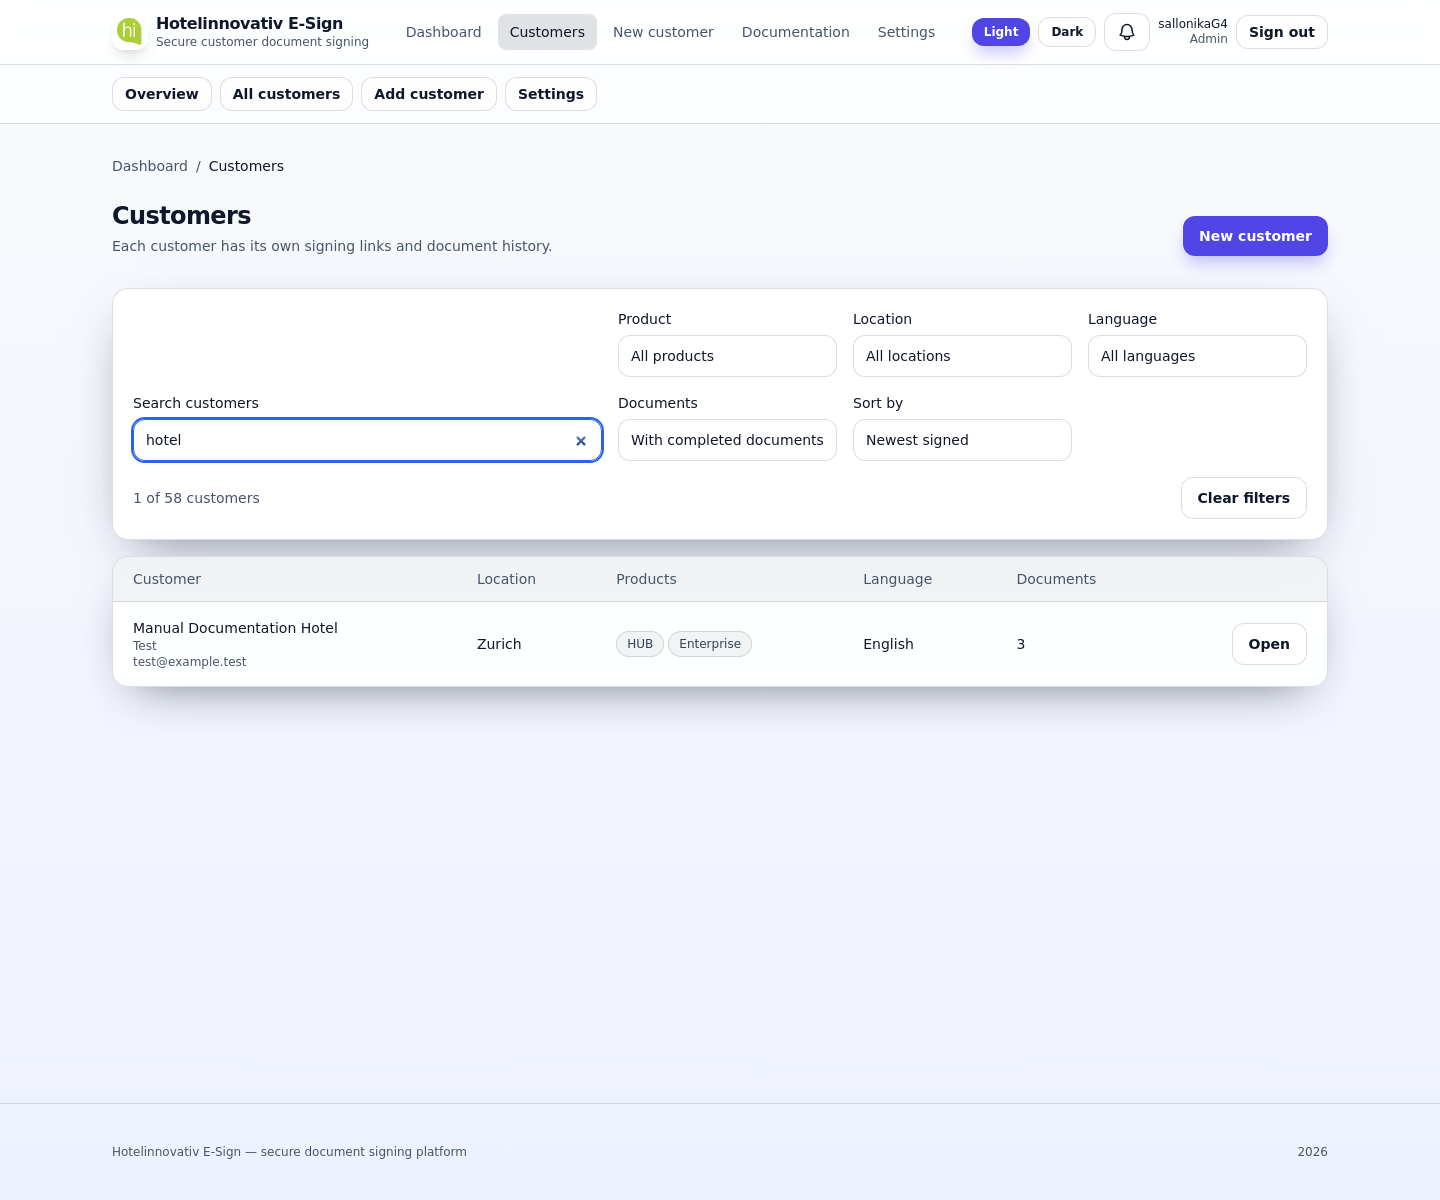
Customers shows property name, location, selected products, language, and document count. Use Open to manage one customer.
Search and filters
The customers page includes a filter panel above the table. Search and dropdown filters update the list immediately in the browser without reloading the page.
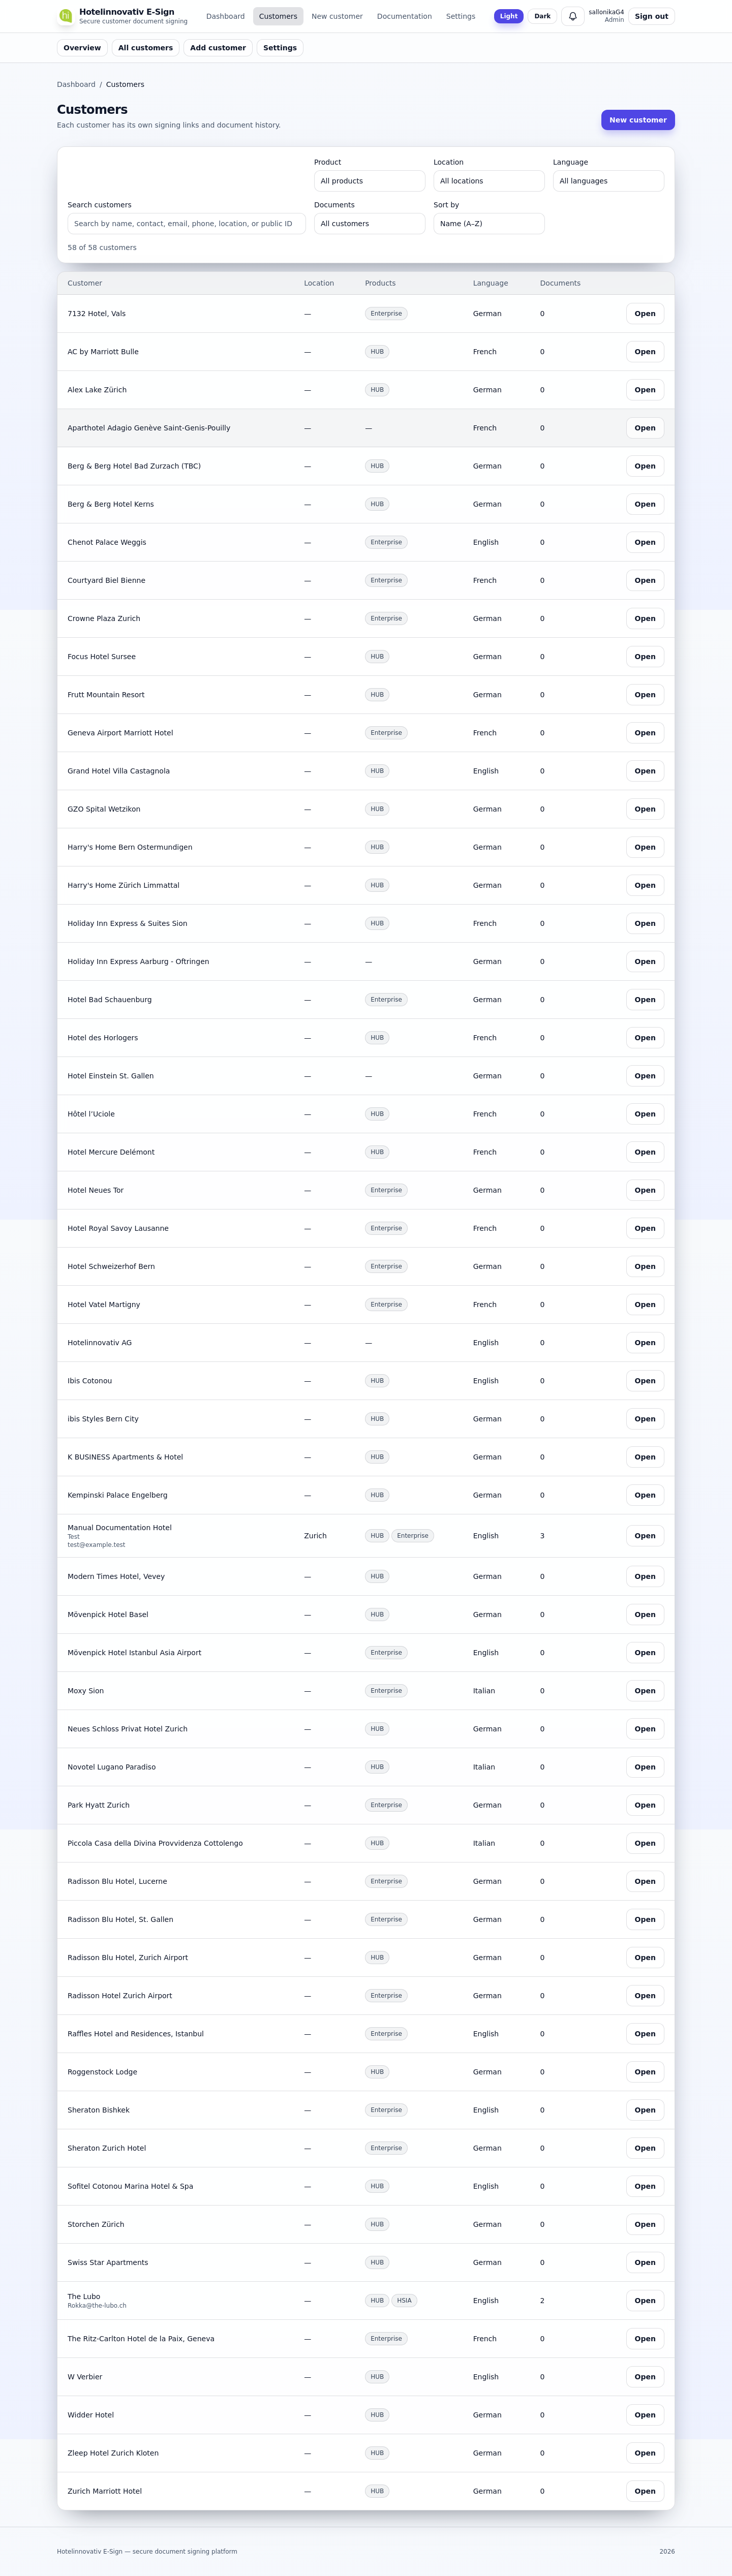
| Control | Purpose |
|---|---|
| Search customers | Matches name, contact person, email, telephone, location, public ID, language label, and product labels |
| Product | Shows customers linked to the selected catalog product |
| Location | Filters by country / city |
| Language | Filters by the customer’s preferred signing language |
| Documents | Limits the list by document activity (see below) |
| Sort by | Reorders visible rows by name, newest signed document, or document count |
Documents filter options:
- With documents / Without documents
- Awaiting signature (pending documents)
- With completed documents
- Signed in the last 7 days / Signed in the last 30 days
Sort by options:
- Name (A–Z) (default)
- Newest signed
- Most documents
The footer shows how many customers match the current filters (for example 12 of 57 customers). Clear filters resets search, dropdowns, and sort order.
Remarks
- Document counts and “newest signed” use only documents visible to your role.
- Sales and design users still only see customers that already have at least one visible document in the base list; managers and admins see the full customer set.
- Combine search with dropdown filters to narrow large customer lists quickly.
5. Create a customer
Select New customer (header or dashboard). Fill in property and contact details, select one or more products (hold Ctrl or Cmd for multiple), set rooms, TVs, and language (signing terms on the public page follow this language, with English fallback).
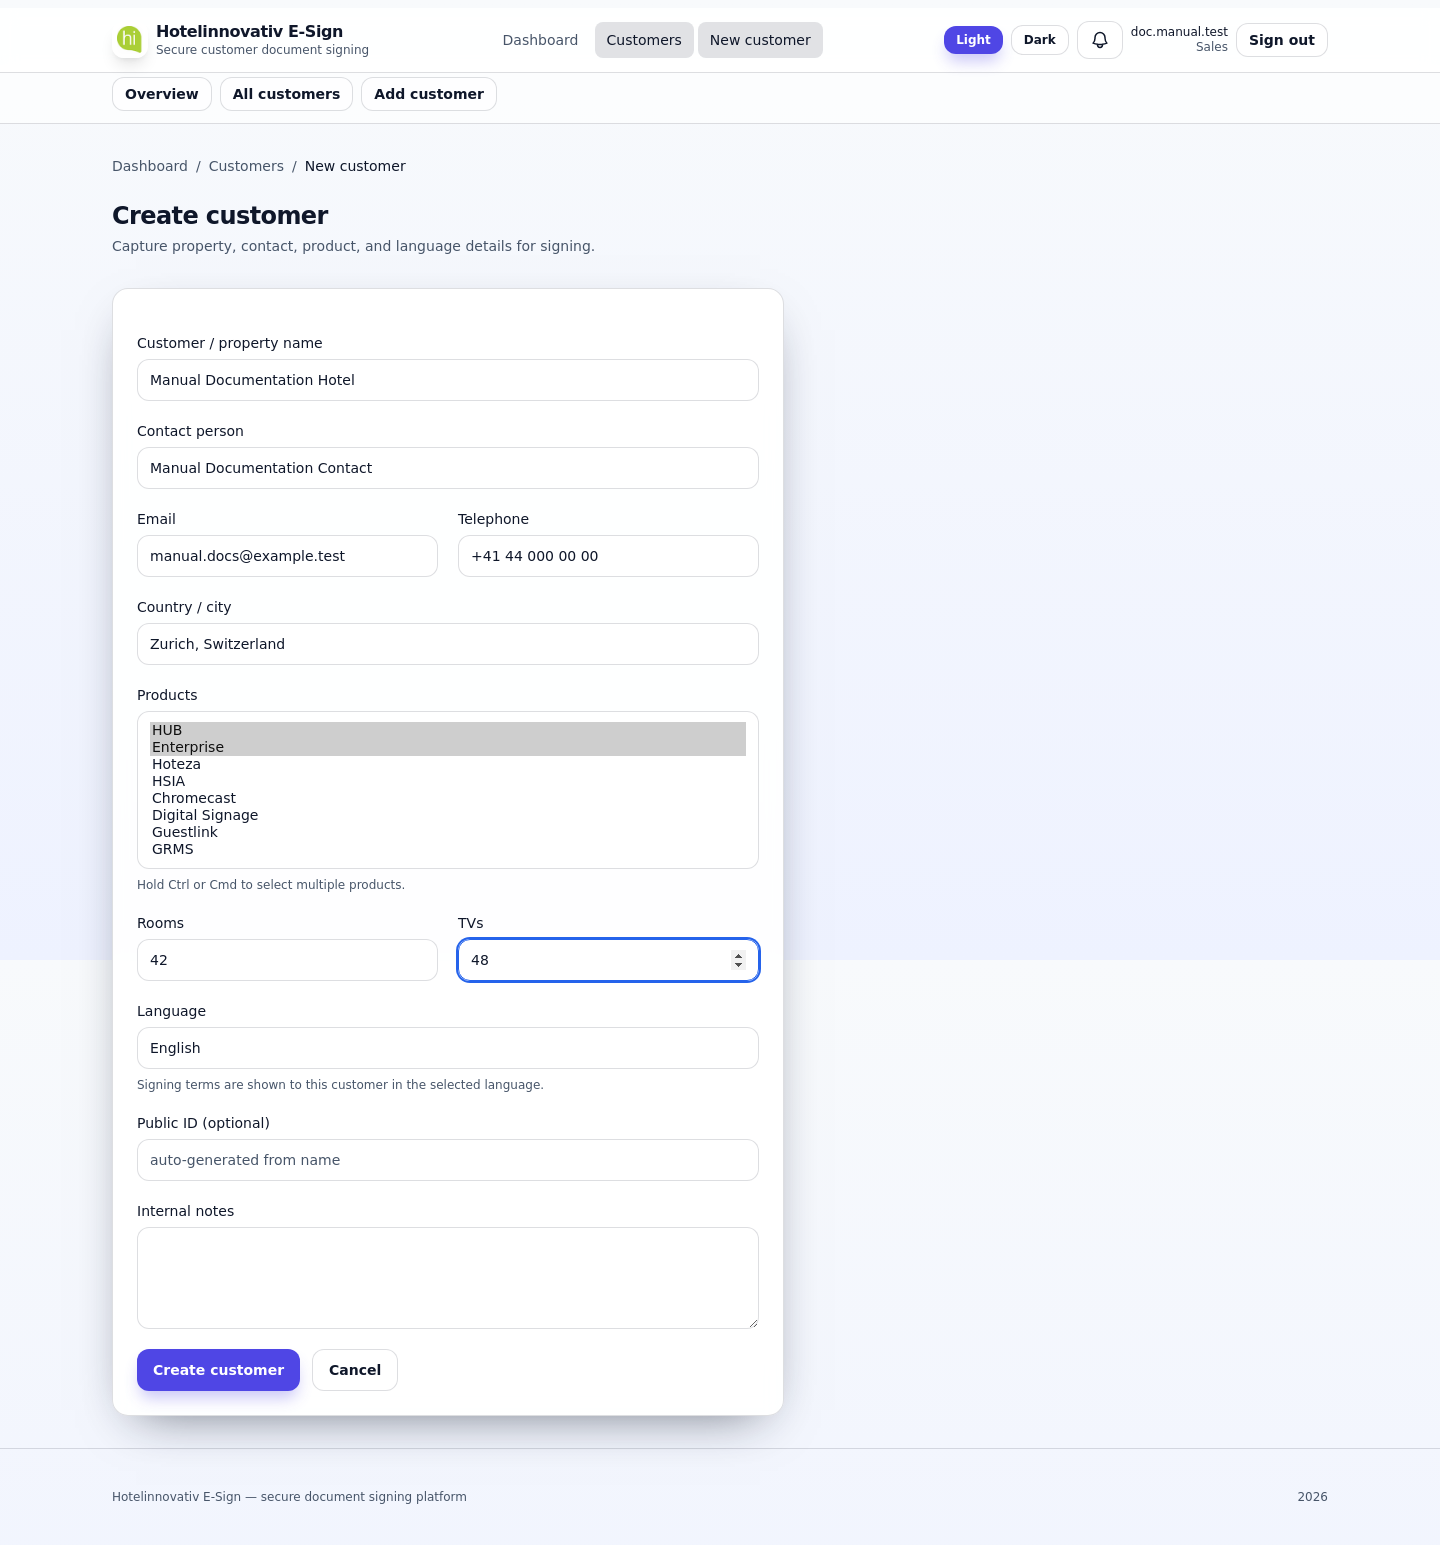
| Field | Notes |
|---|---|
| Customer / property name | Display name on signing pages and emails |
| Contact person / email / telephone | Internal reference; email is not used to send the signing link automatically |
| Country / city | Free text |
| Products | From the catalog maintained in Settings |
| Rooms / TVs | Optional numbers |
| Language | Drives localized signing copy where configured |
| Public ID | Auto-generated from the name on create; required and editable on update |
| Notes | Optional internal notes |
Select Create customer to save. You are redirected to the customer detail page.
6. Customer detail
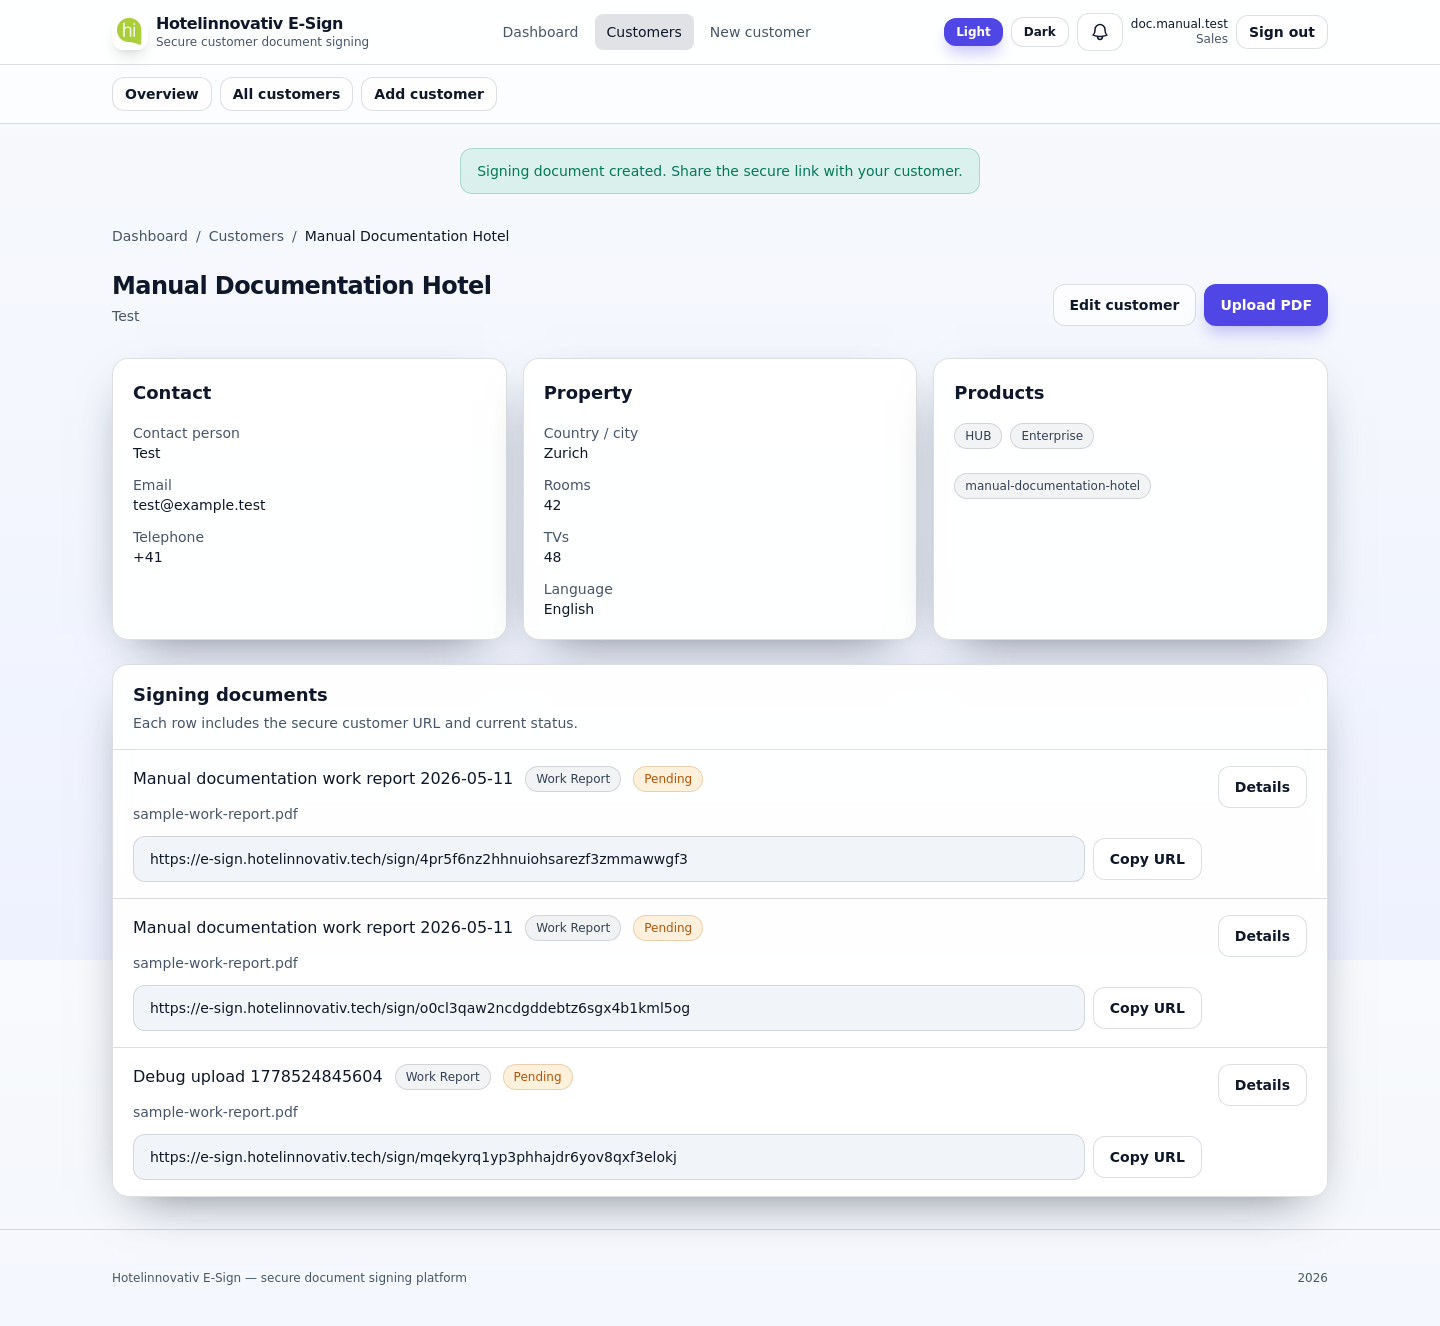
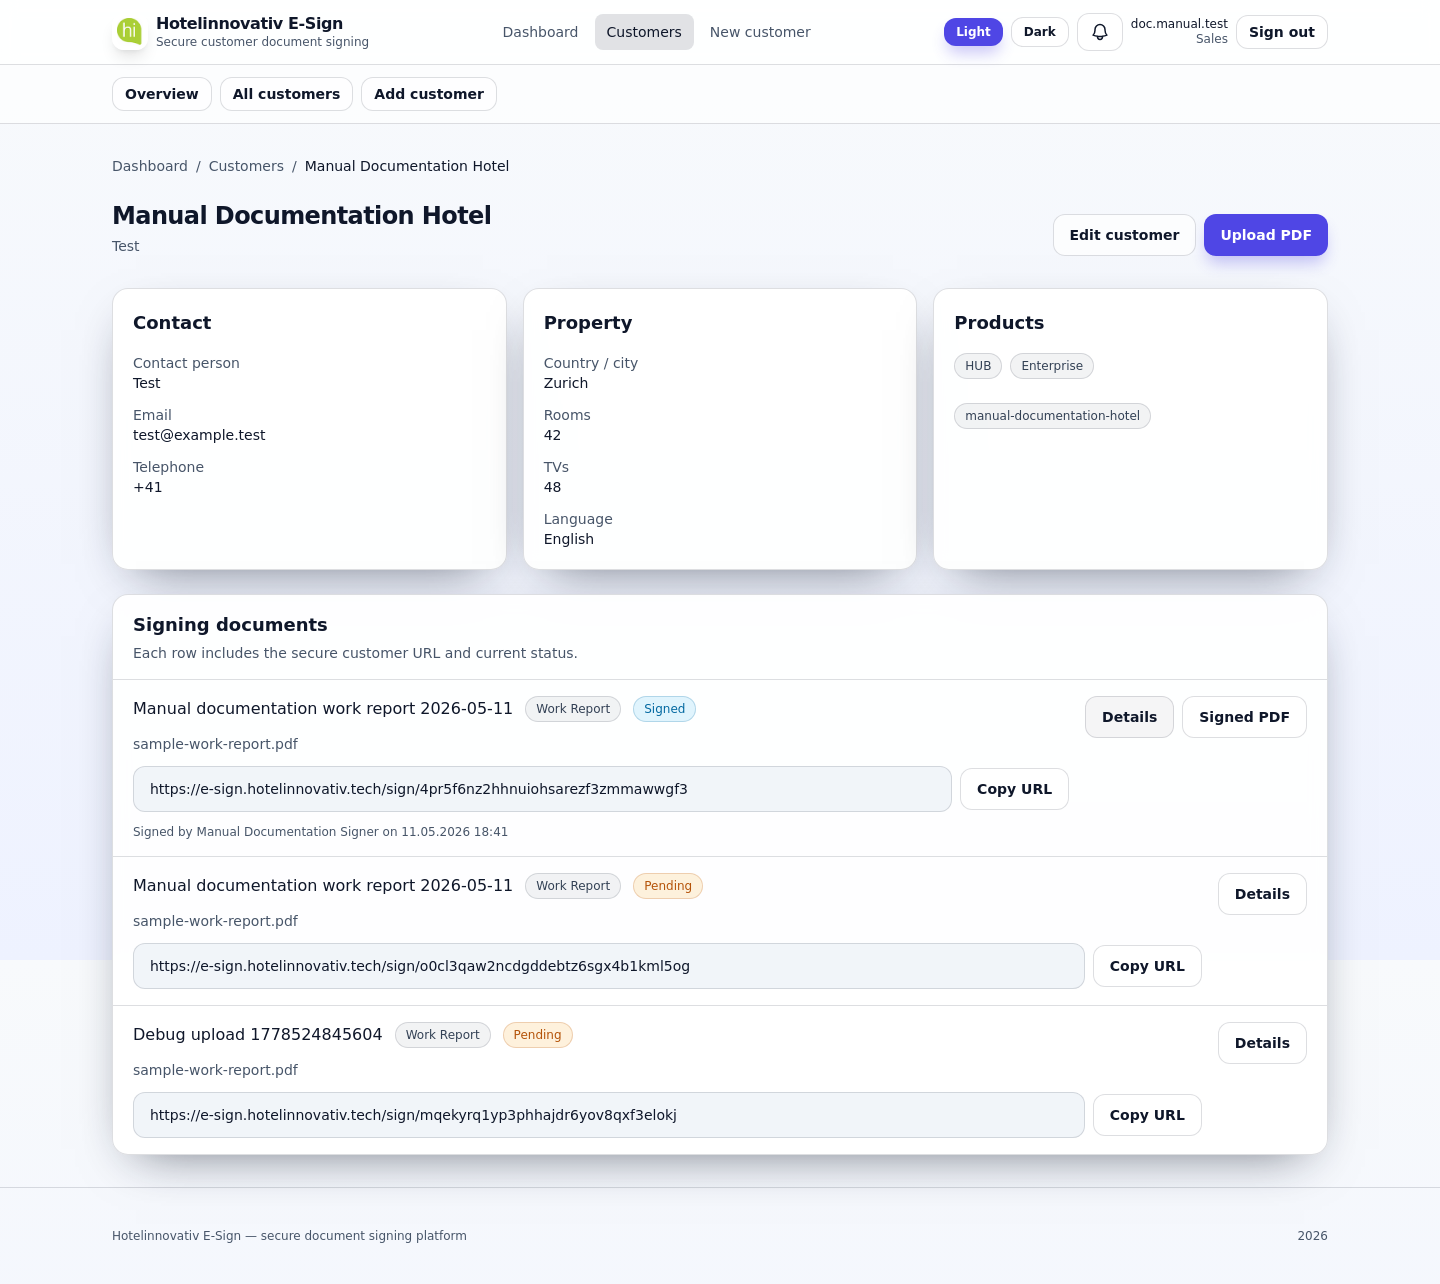
The detail page groups Contact, Property, and Products, then lists Signing documents with type, status, filename, and the customer signing URL.
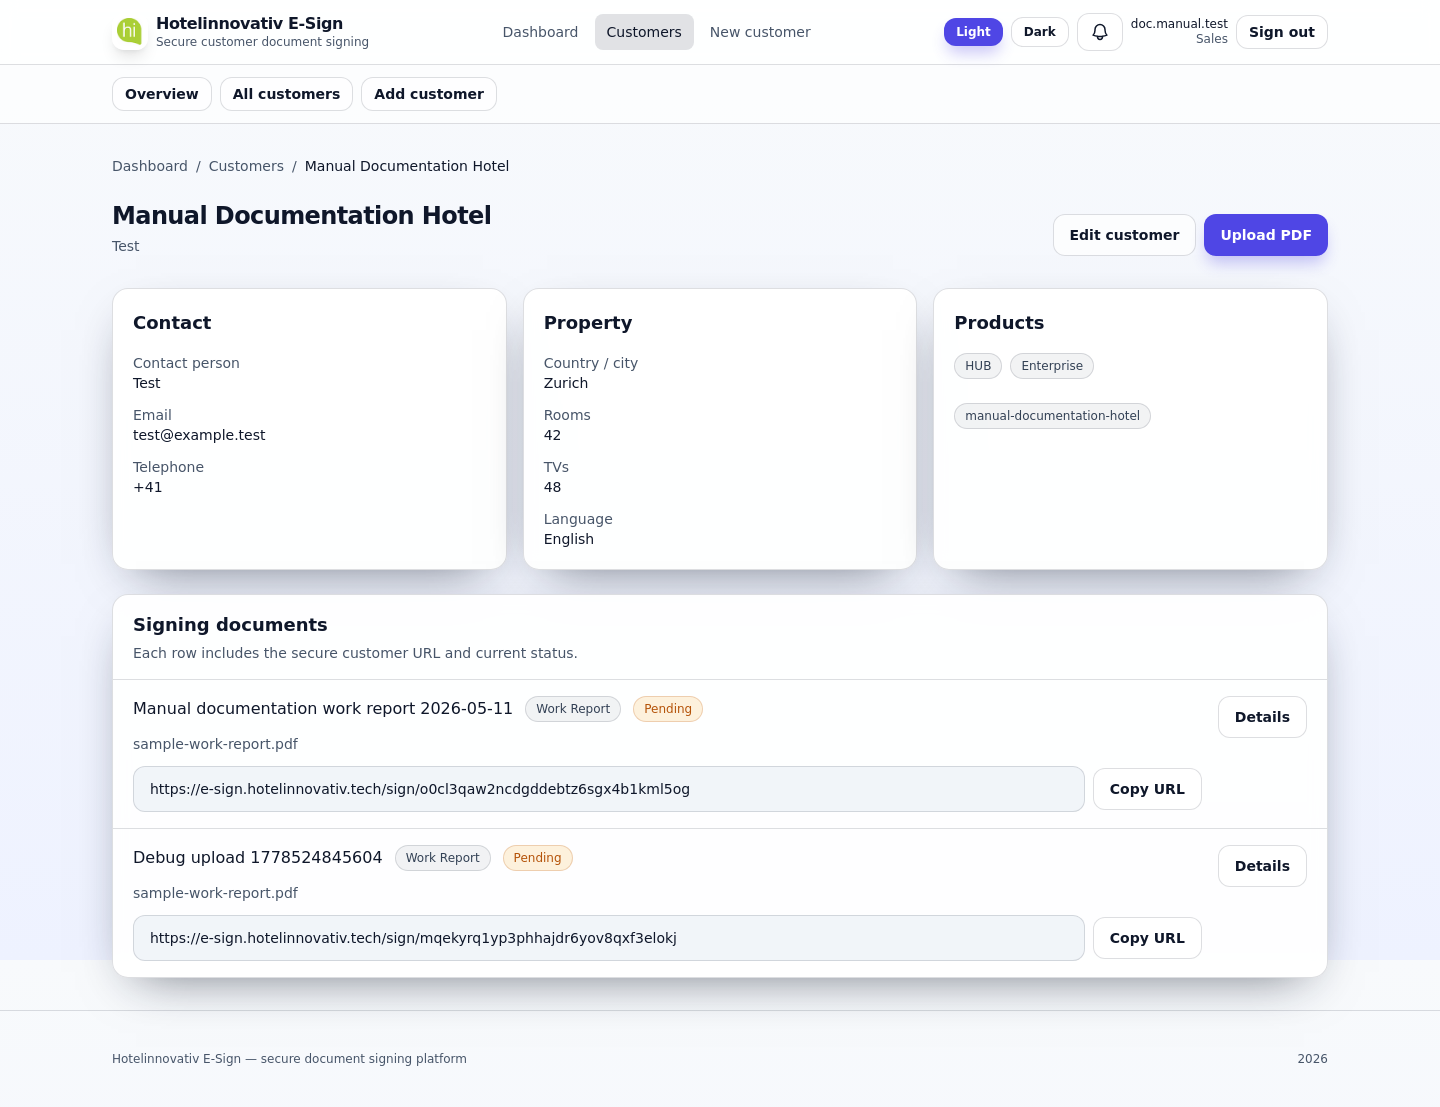
From here you can Edit customer, Upload PDF, open Details for a document, or Signed PDF after completion.
7. Edit a customer
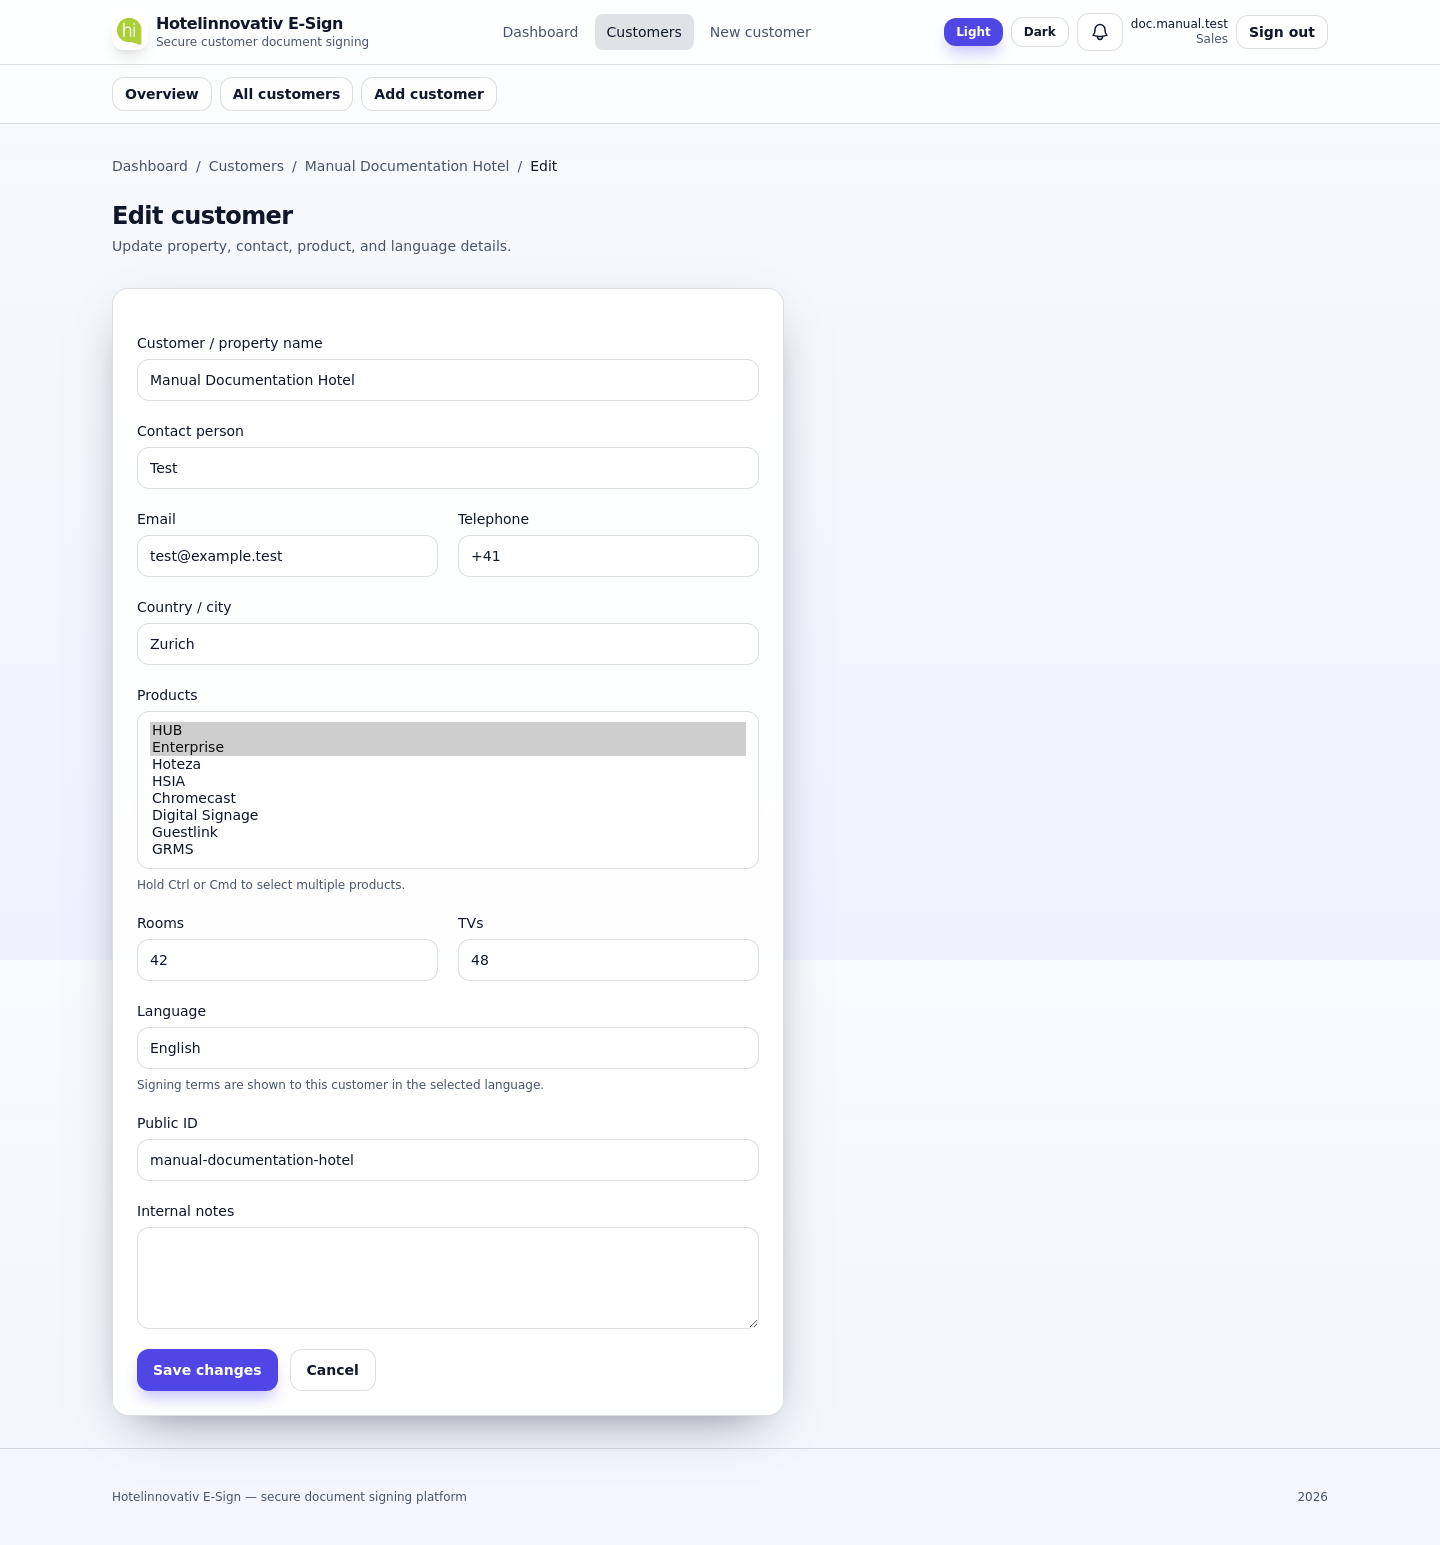
Edit customer opens the same fields as create. Public ID must stay unique. Save changes returns to the detail page.
8. Upload a signing document
On the customer page, choose Upload PDF.
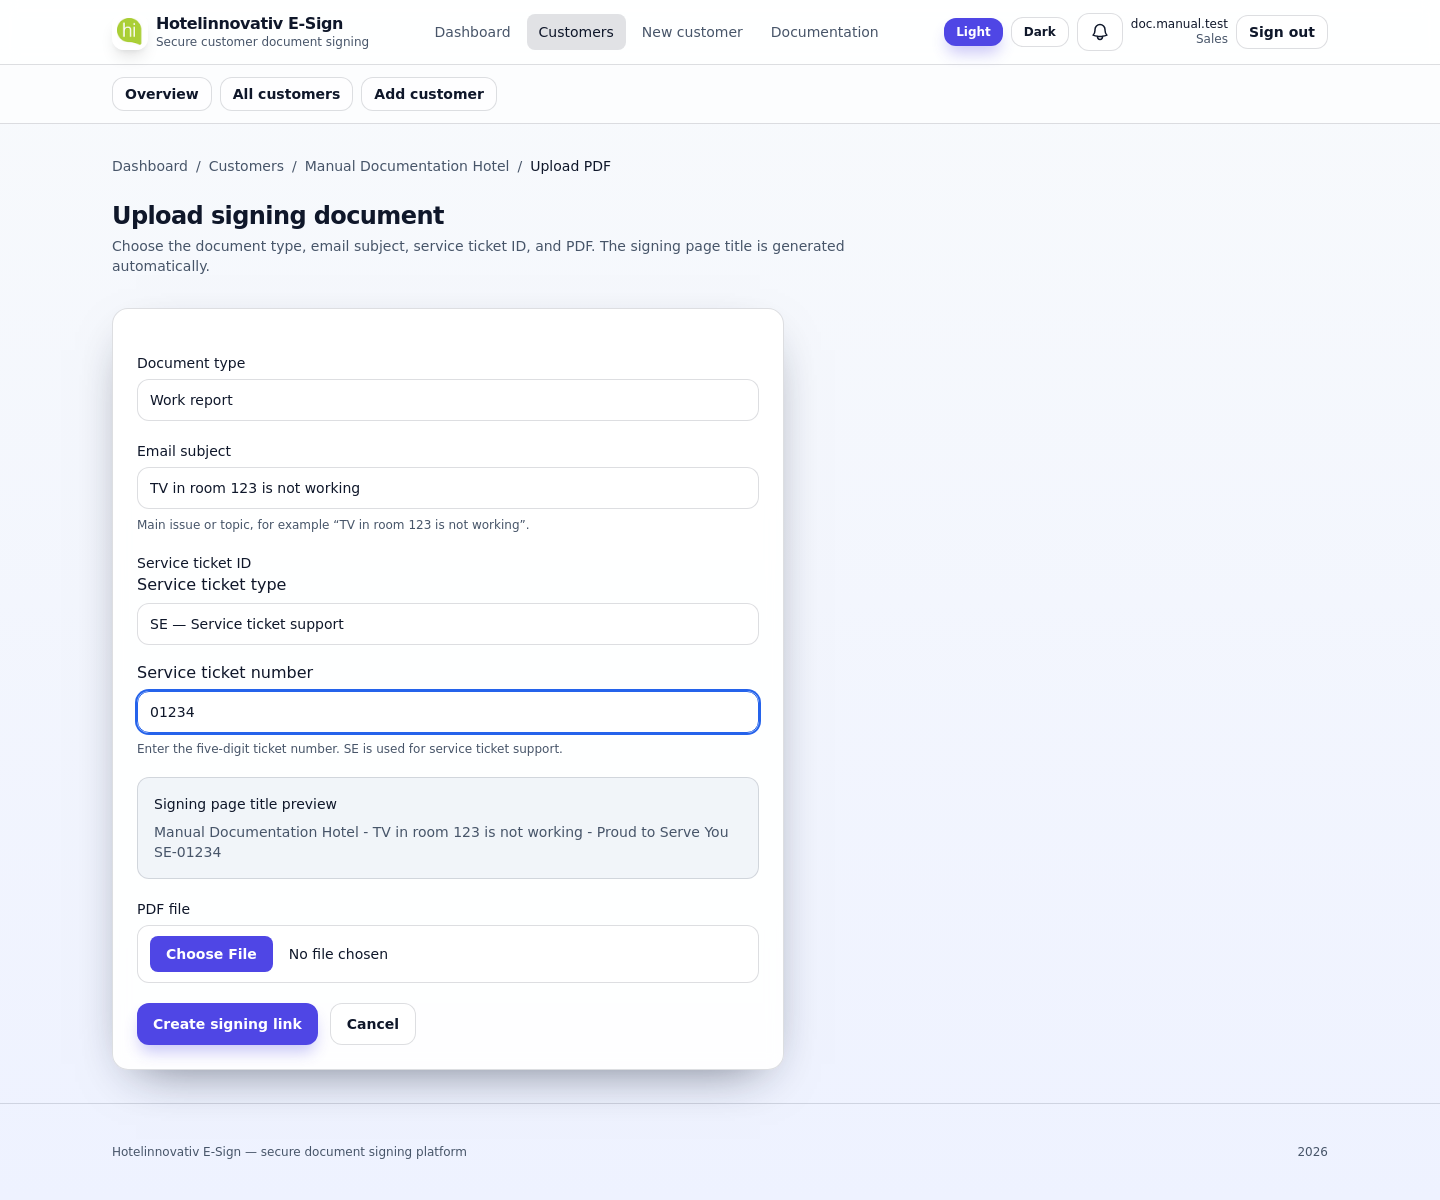
| Field | Notes |
|---|---|
| Document type | Work report, offer, contract, or design (options depend on your role) |
| Email subject | Main issue or topic, for example “TV in room 123 is not working” |
| Service ticket ID | Choose SE (Service Einsatz / service visit), AU (Auftrag / work order), LI (Lieferschein / delivery note), or AN (Angebot / offer), then enter a five-digit number (for example 01234). |
| Signing page title preview | Shows the generated title before upload |
| Signed document delivery | For offer, contract, and design: choose team inbox and/or your email |
| PDF file | Required; size limit is set in server configuration |
The platform builds the signing page title automatically:
{Customer name} - {Email subject} - Proud to Serve You {Type}-{Number}
Example for customer The Lubo, email subject TV in room 123 is not working, type SE, number 01234:
The Lubo - TV in room 123 is not working - Proud to Serve You SE-01234
That full title is shown on the signing page, in customer and document lists, and in notification emails.
Select Create signing link. You return to the customer page with a new row in Awaiting signature and a Copy URL control.
Remarks
- Work reports do not show delivery checkboxes; routing follows platform defaults for that type.
- The signing URL uses an opaque token (
/sign/{token}), not the customer public id. - Send the copied URL to the customer by your usual channel (email, chat, etc.). The platform does not send the link automatically on upload.
9. Customer signing (public page)
The customer opens the link in a browser without logging in. They see a PDF preview and a signing form.
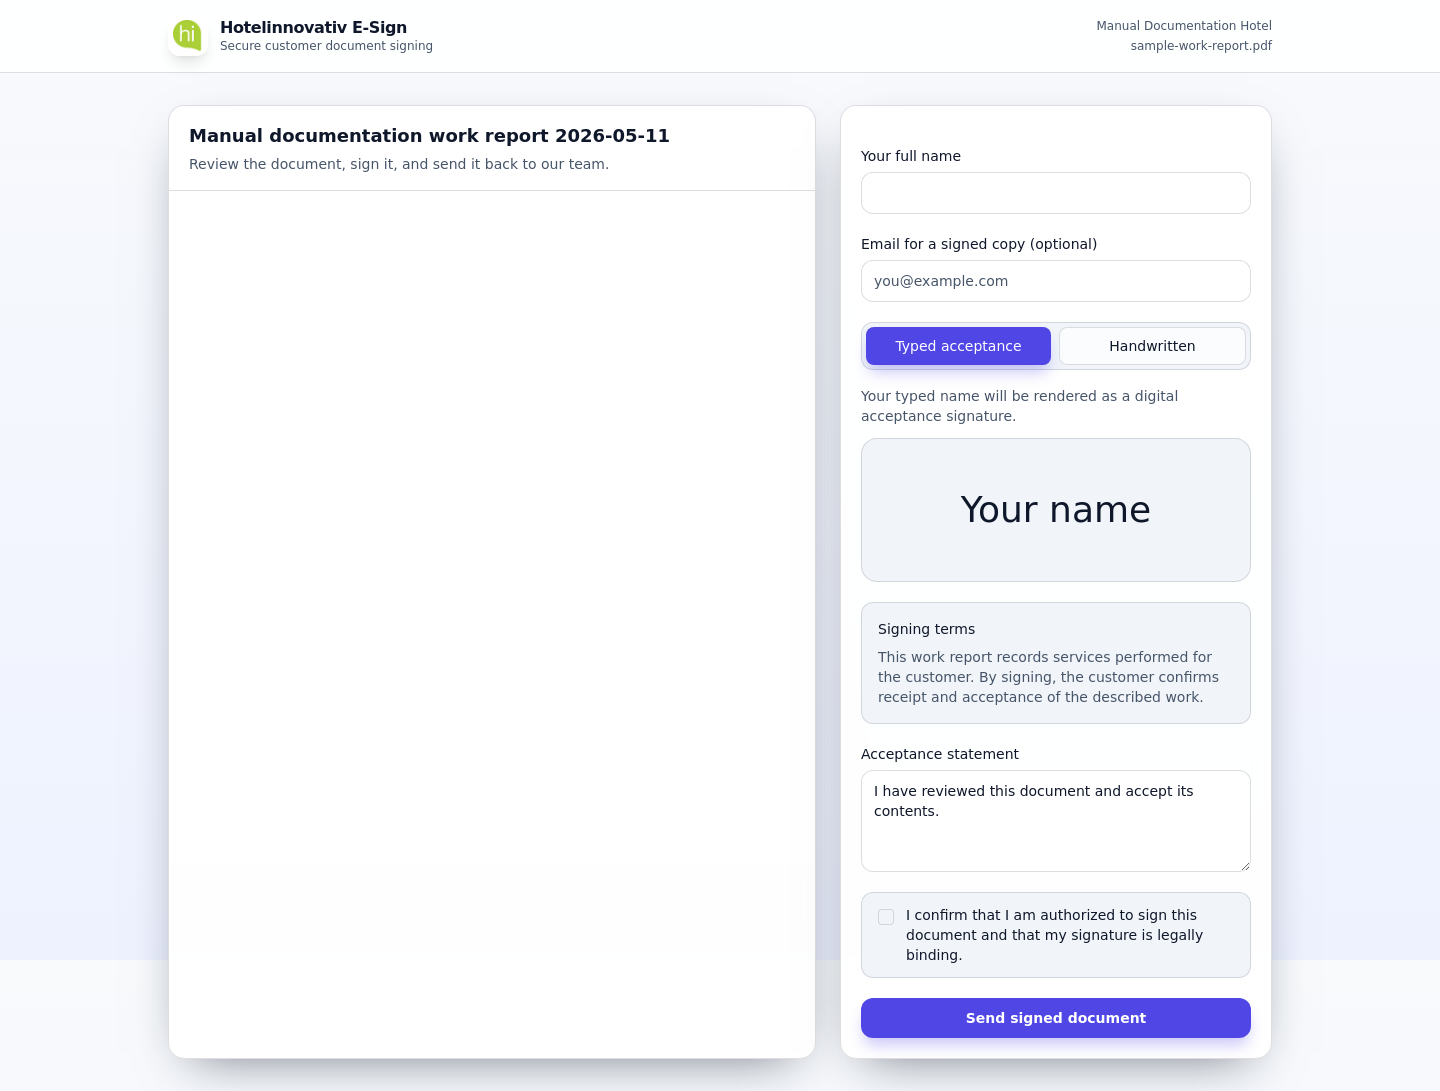
Typical steps for the customer:
- Review the PDF in the preview pane.
- Enter full name and optionally email for a signed copy.
- Choose Typed acceptance or Handwritten signature.
- Read Signing terms (language from the customer record).
- Confirm or edit the Acceptance statement text.
- Check I confirm that I am authorized to sign…
- For offers and contracts, also accept the binding obligation checkbox.
- Select Send signed document.
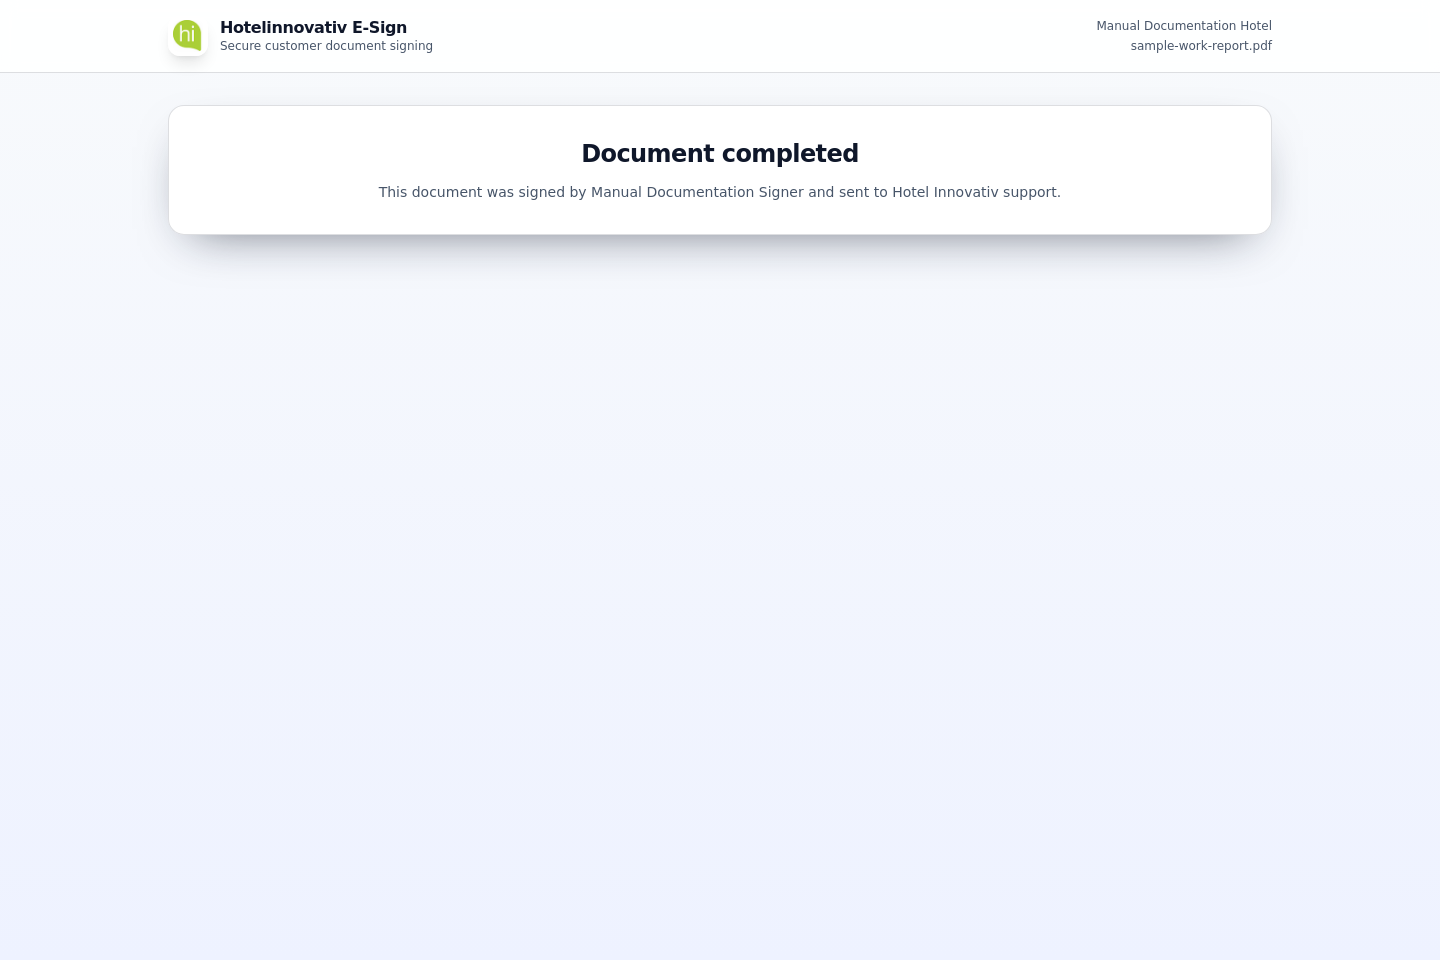
After submission the page shows completion; the link cannot be used to sign again.
Remarks
- Typed signatures render the entered name as the acceptance image.
- Handwritten mode requires a stroke on the canvas before submit.
- If the customer entered an email, they receive a copy of the signed PDF.
10. Notifications after signing
When a visible document is signed, the uploader’s notification bell shows a badge. Open it to read recent events and jump to the document.
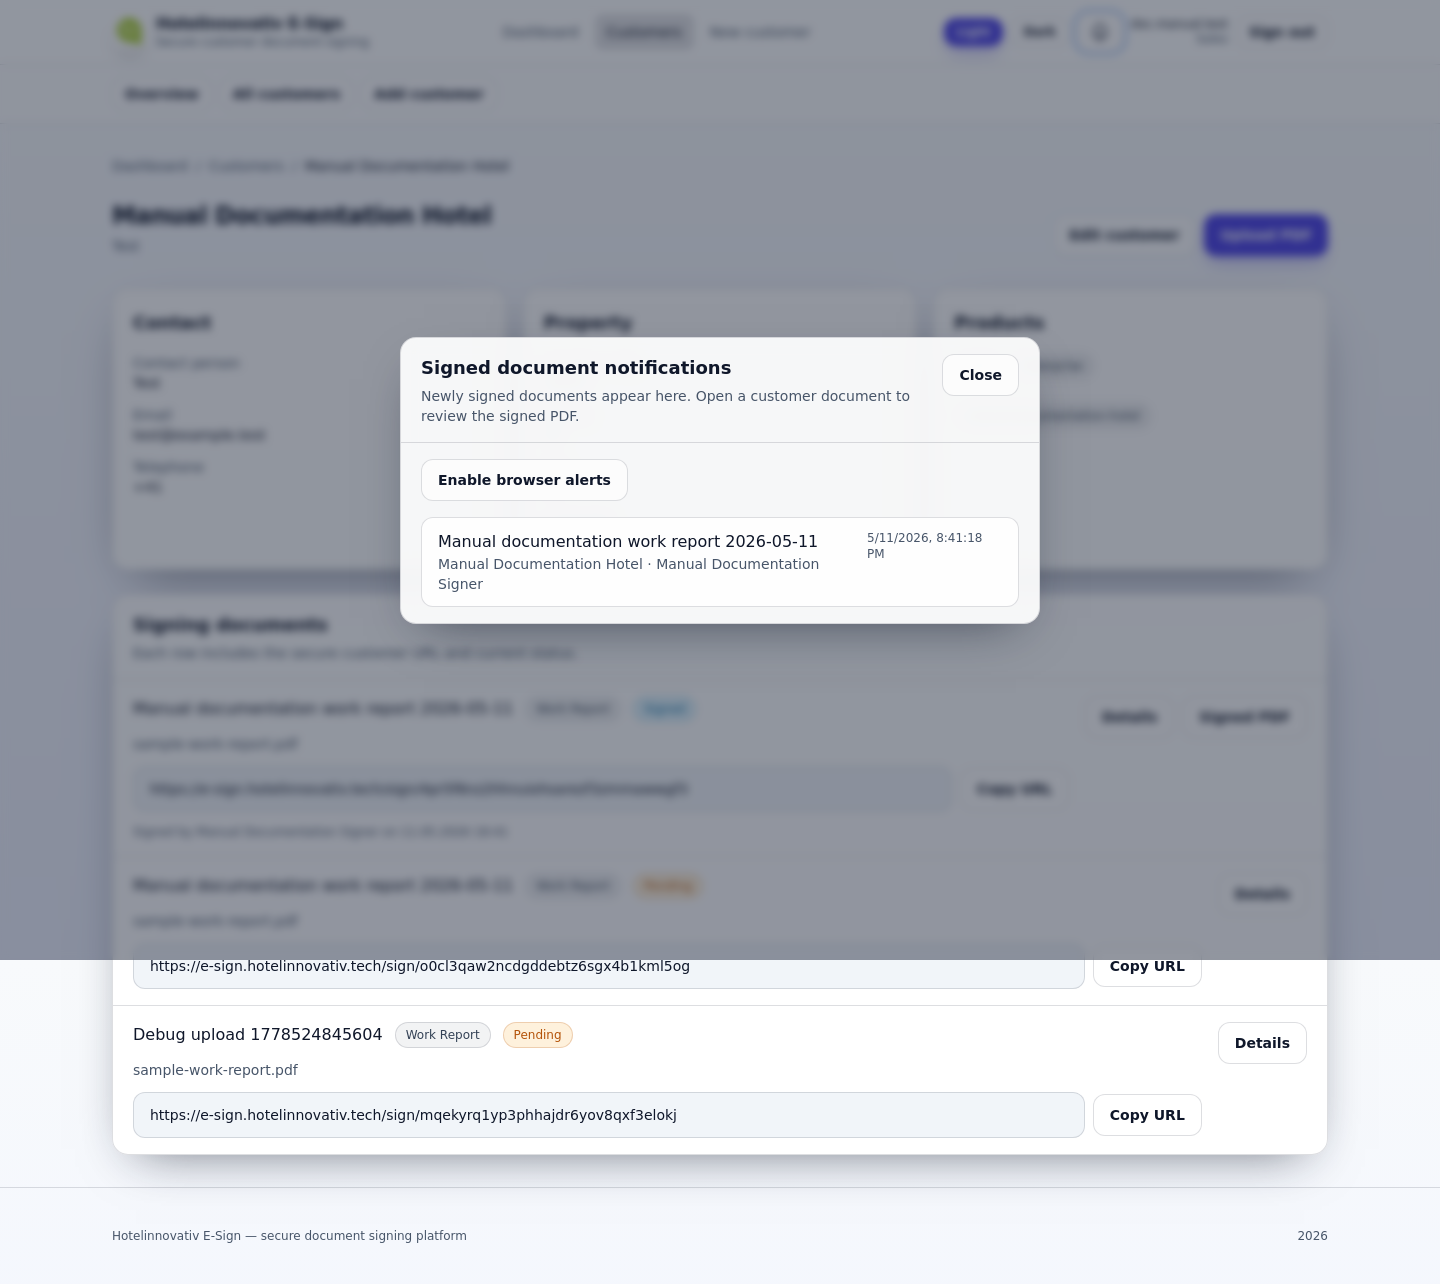
The list clears from the badge after you open the modal (items remain reachable from the customer and document pages). Browser notifications are optional if the browser grants permission.
Remark: Email to team inboxes and the uploader runs in parallel with in-app notifications. Check your mailbox if you expected email and only see the in-app list.
11. Document detail
From the customer row, Details opens metadata: type, status, uploader, signing URL, and after completion signer name, email, timestamp, signature method, and download filename.
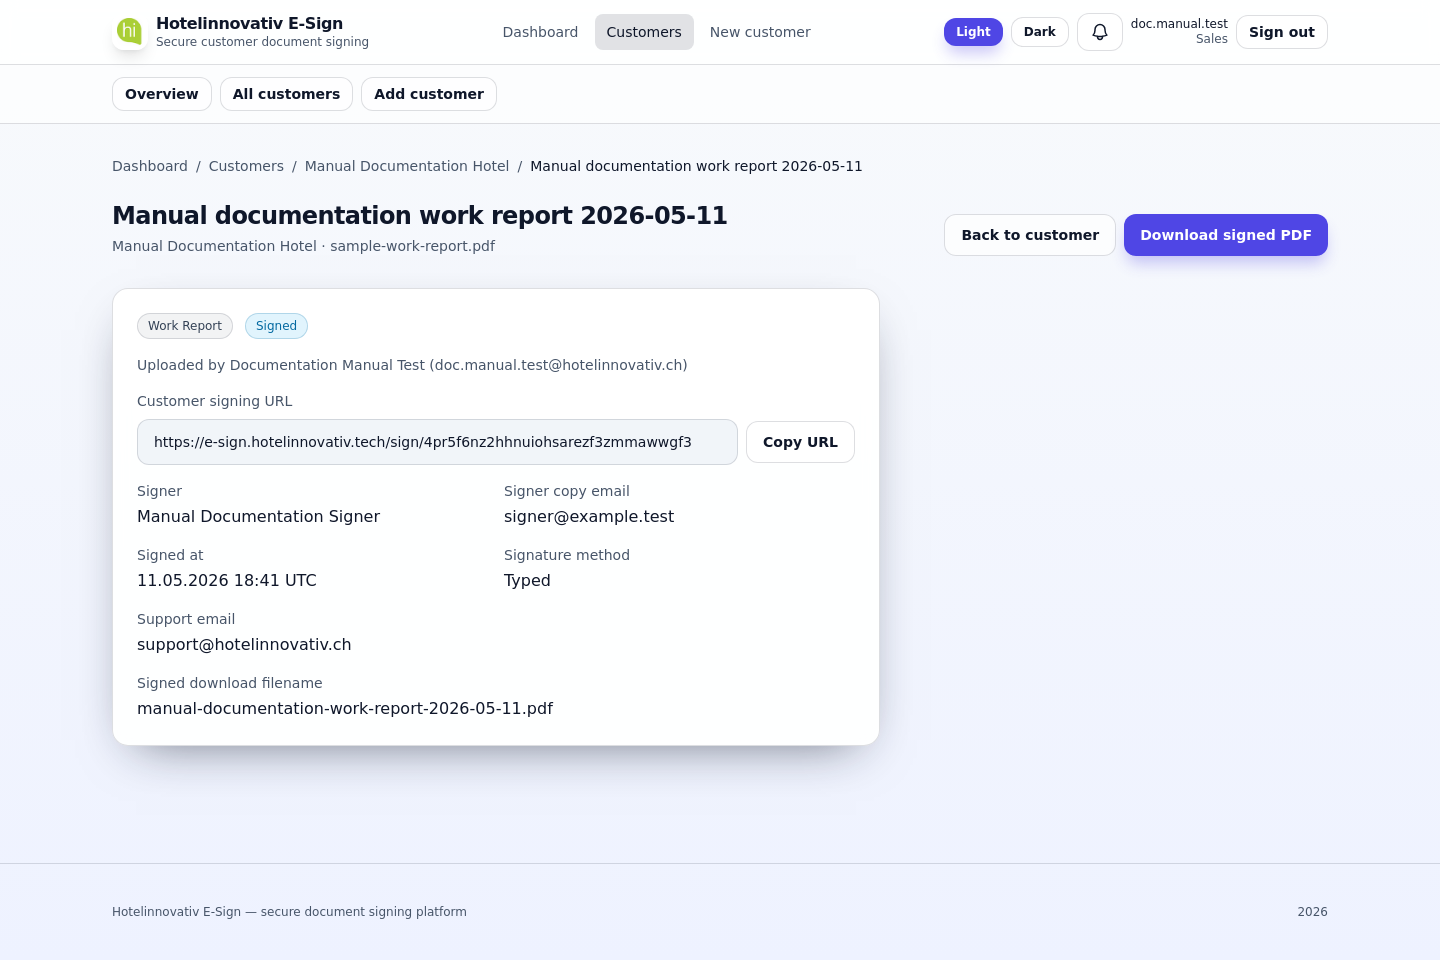
Use Download signed PDF when status is completed.
12. Review on the customer page
The customer’s document list shows Completed, signer name, and time. Signed PDF downloads the file; Details opens the screen above.
Roles at a glance
| Role | Customers | Upload | Settings / delete |
|---|---|---|---|
| Admin | All; add/edit | All types | Full settings/CMS; delete customers and signed documents |
| Support | With visible documents; add/edit | Work reports | No settings; no delete |
| Sales | With visible documents; add/edit | Work reports, offers, contracts | Signing terms only; no delete |
| Manager | All; add/edit | All types | Signing terms; delete customers and signed documents |
| Design | With visible documents; add/edit | Design | No settings; no delete |
Operational remarks
- Session: Use Sign out on shared machines. The header also contains a sign-out form; when automating or testing, submit only the intended form (customer or document upload), not the header sign-out control.
- Imports: Bulk customer import from spreadsheets is available on the server via
php artisan esign:import-sites {path}. - Catalog gaps: Import files may list product codes that are not in the product catalog; those rows import without a product match until the catalog is updated.